Tie dye is a wonderful way to bring new life to your old clothes. It is a craft that people of all ages can enjoy together. When you start exploring different tie dye techniques, you realize that the options are truly endless. You do not need to be a professional artist to make something beautiful. All you need is some fabric, a bit of colorful dye, and a little bit of patience. This hobby has grown from a simple backyard activity into a massive trend seen in high fashion and home decor. Many people find the process very relaxing and rewarding because every single piece you make will be unique.
Preparing Your Workspace for Success
Getting started with tie dye techniques is easier than you might think. You should always begin with clean, white cotton materials for the best results. Natural fibers like cotton or silk soak up the liquid color much better than synthetic fabrics. Before you start the messy part, it is a good idea to set up a dedicated workspace. Using a plastic tablecloth or working outside can save you from a lot of cleaning later. Make sure you have your rubber bands, gloves, and squeeze bottles ready to go. Preparing your space properly is a key step in ensuring your project turns out exactly how you imagined it in your mind.
Creating the Iconic Classic Spiral
The spiral pattern is one of the most famous tie dye techniques used today. To create this look, you simply pinch the middle of your fabric and twist it into a tight circle. It ends up looking like a cinnamon roll before you put the bands on it. Once it is secured, you apply different colors to each wedge of the circle. This creates a beautiful sunburst effect that looks amazing on t-shirts and hoodies. This specific method is often highlighted in style guides because it is so recognizable and fun to wear. It is a great starting point for anyone who is new to the world of fabric art.
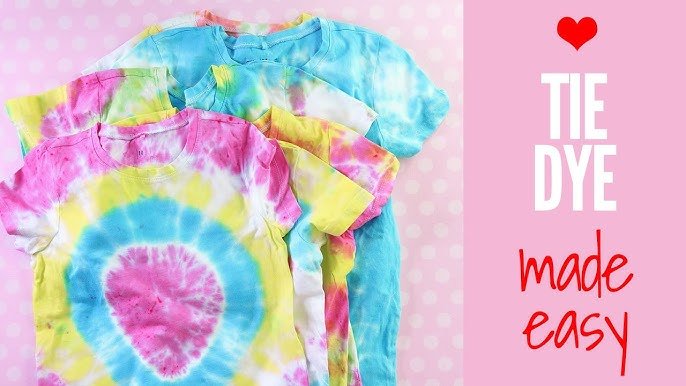
Making a Bold Statement with the Bullseye
Another classic choice among tie dye techniques is the bullseye design. This pattern creates large concentric circles that draw the eye to the center of the garment. To do this, you pull the fabric up from the center to create a long tube shape. You then place rubber bands at different intervals down the length of the tube. When you apply the dye between the bands, you create rings of color. This technique is very popular for making bold statements. It works perfectly on the back of jackets or the front of tote bags. It is simple enough for a child to master but looks very professional.
Effortless Style with the Crumple Method
For a more modern look, many artists prefer the crumple method. This is one of the easiest tie dye techniques because there is no specific folding required. You just scrunch the fabric into a messy ball and wrap it loosely with rubber bands or string. When you apply the dye, the color hits the folds in a random way. This creates a marbled effect that looks like clouds or water. It is a very forgiving style because you cannot really make a mistake. Many fashion experts appreciate this look because it feels organic and sophisticated compared to more rigid patterns.
Achieving Clean Lines with Stripe Patterns
If you want something very neat, the stripe pattern is a great option. You can make horizontal or vertical stripes depending on how you fold the cloth. To get clean lines, you fold the fabric like a paper fan or an accordion. Once it is folded into a long strip, you place bands tightly across it. When using these tie dye techniques, the bands act as a barrier to the ink. This results in crisp white lines between your chosen colors. It is a fantastic way to make a shirt look more structured and intentional while still being colorful and bright.
Brighten Your Day with the Sunburst Look
The sunburst technique is very similar to the bullseye but uses multiple small points. Instead of pulling up just the center, you pull up several small tufts of fabric all over the shirt. You tie each tuft with a rubber band before applying the dye. This creates many small circles that look like stars or flowers across the material. These tie dye techniques are perfect for summer dresses or baby clothes. It gives a delicate and playful vibe to any project. It is also a fun way to use up leftover dye from other larger projects you might have finished.
Exploring the Tradition of Japanese Shibori
Shibori is a traditional Japanese version of tie dye techniques that uses indigo blue. It often involves folding fabric around poles or using wooden blocks to create geometric shapes. While classic tie dye is often bright and rainbow-colored, Shibori is usually more calm and focused. This style has gained a lot of respect in the business world, with many high-end brands featuring these patterns. It shows that tie dye can be very elegant and upscale. Learning this method helps you understand the history of fabric dyeing and how different cultures have used it for centuries.
Choosing the Best Materials for Your Art
When using any tie dye techniques, the type of dye you choose is very important. Fiber-reactive dyes are the best choice because they bond chemically with the fabric. This means the colors will stay bright even after many washes in the laundry. Cheap kits often use dyes that fade quickly, which can be disappointing after all your hard work. It is also helpful to use soda ash as a pre-soak for your clothes. This helps the fabric accept the color more deeply. Taking these extra steps ensures your creations look like they came from a high-end retail shop.
Safety Tips for a Fun Crafting Day
Safety is always a priority when working with chemicals and powders. You should always wear gloves to keep your hands from being stained for days. It is also smart to wear an apron or old clothes that you do not mind getting messy. When mixing dye powders, try to do it in a well-ventilated area so you do not breathe in the dust. These simple precautions make the experience much more enjoyable for everyone involved. Once you feel safe and prepared, you can fully focus on the creative part of the tie dye techniques you are using.
Tie Dye in Modern Business and Fashion
Leading designers and business moguls have recently embraced the DIY aesthetic in their collections. This shift has turned simple tie dye techniques into a symbol of creativity and self-expression. Many successful entrepreneurs value the “maker movement” because it encourages people to build things with their own hands. Seeing these patterns in major magazines shows that this craft is here to stay. It bridges the gap between home crafts and professional design. By practicing these methods, you are participating in a global trend that celebrates individuality and artistic freedom.
Summary of Popular Design Methods
| Technique Name | Difficulty Level | Main Visual Feature | Best For |
| Spiral | Beginner | Twisted Sunburst | T-shirts |
| Bullseye | Beginner | Large Circles | Hoodies |
| Crumple | Very Easy | Marbled Texture | Pillowcases |
| Accordion | Intermediate | Straight Stripes | Tote Bags |
| Shibori | Advanced | Indigo Geometry | Home Decor |
Finishing and Rinsing Your Creation
After you finish applying the color, the waiting game begins. You should let your fabric sit in a plastic bag for at least 24 hours. This gives the dye enough time to fully soak into the fibers. If you rinse it too early, the colors might look pale or washed out. When it is finally time to rinse, use cold water until the water runs clear. Then, wash the item by itself in the machine to remove any extra ink. Following these final steps is just as important as the tie dye techniques themselves for a perfect result.
Conclusion
We hope this guide inspires you to grab some dye and start your own project today. Tie dye techniques are a path to relaxation and a way to show off your personality. Whether you make a shirt for yourself or a gift for a friend, the effort is always worth it. The joy of unwrapping a finished piece to see the pattern for the first time never gets old. It is like opening a colorful present that you made for yourself. Keep practicing and experimenting with new colors to find your own signature style.
Frequently Asked Questions
What is the best fabric for tie dye?
The best fabric is 100% cotton. Natural fibers like linen, silk, and hemp also work very well. Avoid polyester because it does not absorb the dye properly.
How long should I leave the dye on the shirt?
You should leave the dye on for at least 8 to 24 hours. Leaving it longer usually results in much brighter and more vivid colors.
Can I tie dye dry clothes?
Yes, you can tie dye dry clothes, but damp clothes are usually easier to fold. Damp fabric also helps the dye spread more evenly through the layers.
Do I need to wash the shirt before dyeing it?
Yes, you should wash new shirts to remove any chemicals or oils from the factory. This helps the dye stick to the fabric much better.
How do I stop the colors from bleeding?
Make sure you rinse the fabric thoroughly in cold water after the dye has set. Also, wash the item alone for the first few times in the laundry.
Will the tie dye stain my washing machine?
Usually, it will not stain if you run a quick empty cycle with a little bleach after washing your dyed clothes. Always wipe down the rubber seals as well.